Visualizer 3D StudioWired Data Import via USB Cable
After selecting the proper OKM Detector as described in section Importing Scan Data from Detector, several additional options may be selected according to your detection device.
Prepare Data Transfer
At this moment your detector needs to be plugged in to your computer. Please make sure it has been connected via USB cable and that all USB drivers has been installed correctly.
In case there is no Serial Number displayed, check if your OKM Detector has been plugged in properly. Also make sure it is powered on and click  to scan for connected devices.
Furthermore you have to select the Destination Folder, where all stored scan files will be transferred to.
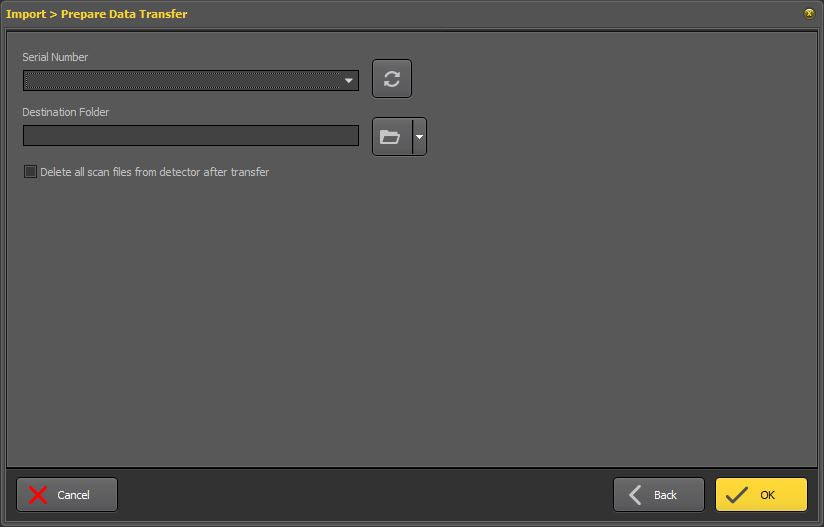
Additionally you may check Delete all scan files from detector after transfer to remove all the files from the internal memory of your connected device after the files has been transferred.
After all information has been set up, click on "OK" to start importing all stored files from your OKM Detector.